In this article we will discuss scanning documents and/or photos as PDF's at the Scanning Stations in the Library. The topics will include:
- How to scan items into Acrobat.
- How to make the text in your PDF searchable.
- How to crop the PDF.
- How to rotate the PDF.
- How to adjust the quality of the PDF.
Why a PDF?
PDF's are a cross platform file type that can be opened on any computer that has an application installed that can read PDF's — such as Adobe Reader — regardless of the operating system on the machine. Unlike Word where the visual formatting can change ever so slightly when saving on a Mac and viewing on a Windows machine, or vice versa, the formatting of a PDF stays exactly the same. You can also add interactive components to a PDF, such as fields that can be edited by the recipient. If you decide to print a PDF, it will also try to autosize the PDF to fit the size of paper.
Getting Started
The first step is to make sure the scanner is powered on. If there is no green LED indicator light on the left side of the scanner, push the power button located on the bottom left side of the scanner. After the scanner has powered on place whatever you'd like to scan on the glass scanner bed as close to the upper left hand corner as possible. Next, find the the Adobe Acrobat shortcut (not Adobe Reader) on the desktop.
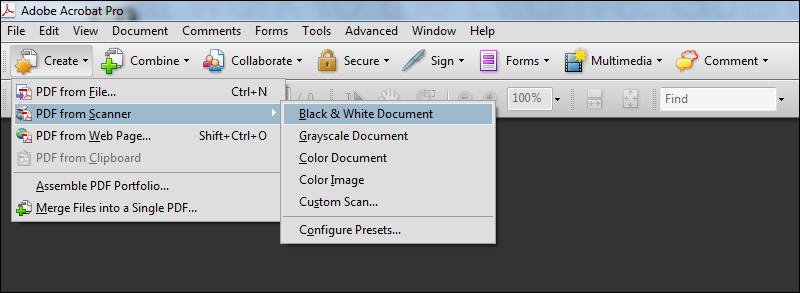
Once Acrobat is open click the Create button in the menu bar, then click PDF from Scanner, followed by the most appropriate scan type for your document or image. Acrobat will immediately start scanning.
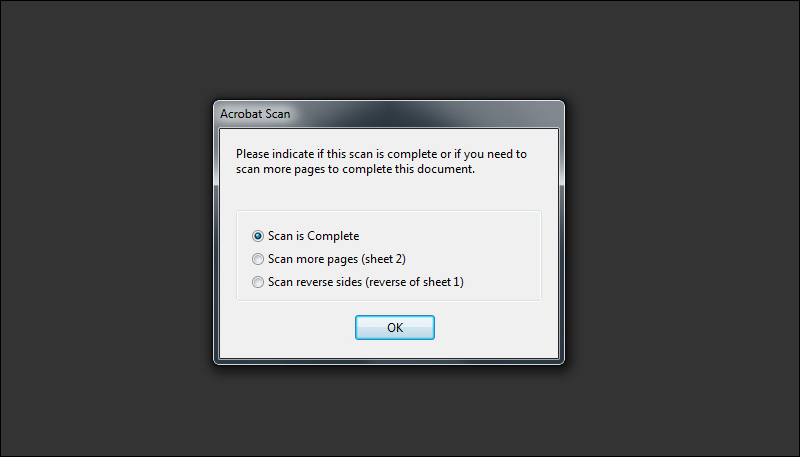
Once the first scan is complete you can choose to Scan more pages if you have more items that you wish to scan. If you're done just select Scan is Complete and click Ok.
If you have more pages to scan make sure to put them on the scanner bed before selecting Scan more pages and clicking Ok.
Make Your PDF Searchable
Adobe Optical Character Recognition (OCR) allows you to make your PDF searchable. This is a great feature to enable on your PDF's as it will do a couple useful things automatically. The OCR process will adjust the orientation of a document and make necessary adjustments to improve the readability of the text you've scanned. Once that is done the OCR process will attempt to read and make searchable any text that it finds, this makes finding the content within a PDF really easily with a simple search in Windows or OS X.
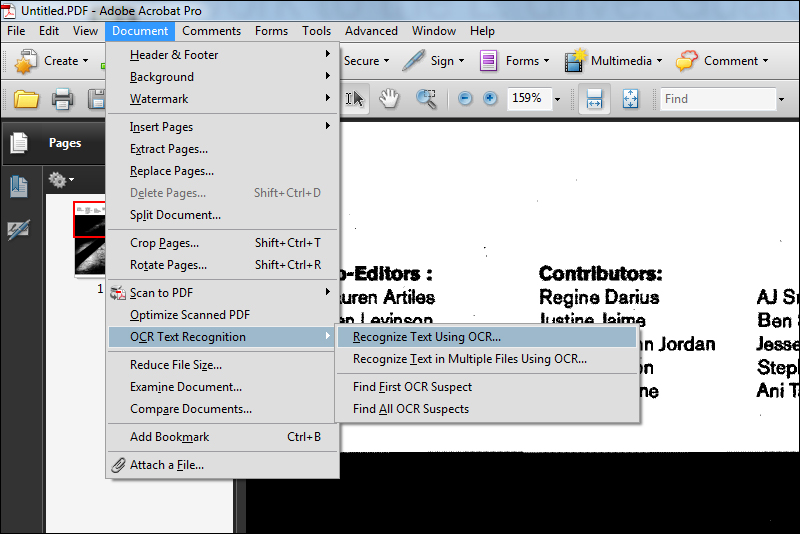
To start, click Document -> OCR Text Recognition -> Recognize Text Using OCR.
A new window will pop up, but the default settings will work for the majority of PDF's so go ahead and click OK.
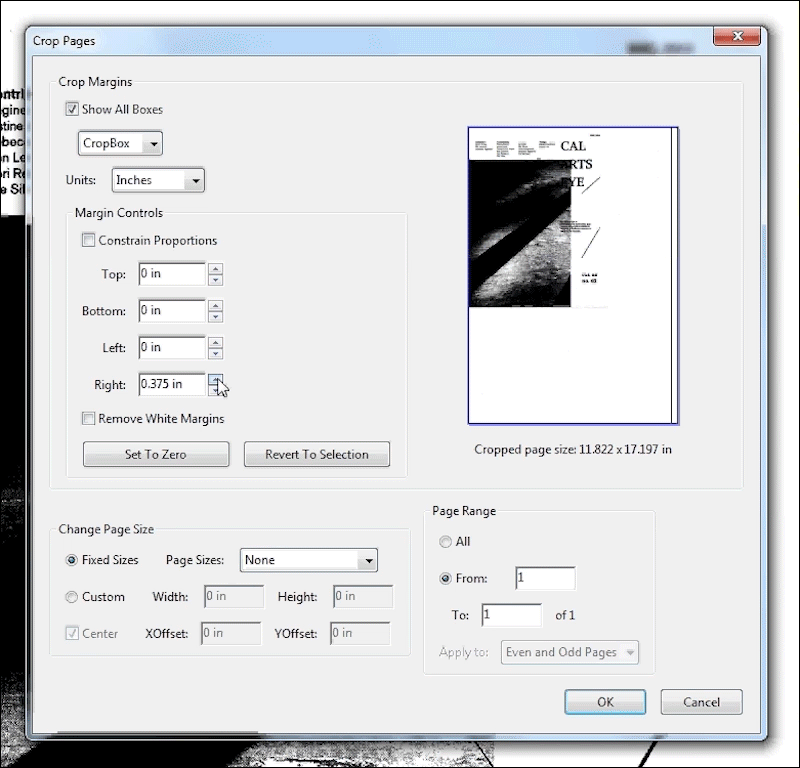
Cropping Pages Manually
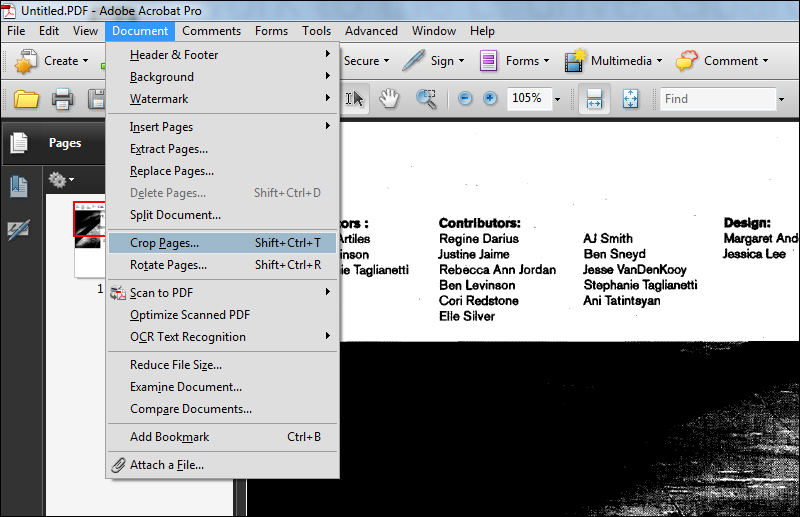
Once your item finishes scanning, you may notice you need to crop extra whitespace out of the PDF. Luckily, this is really easy to accomplish in Acrobat. To do this, go up to the top menu bar, and select Document -> Crop Pages.
This will open a new window where you can begin cropping the PDF. The easiest way we've found to accomplish cropping a custom size is to use the Margin Controls section. You can click the up or down arrows for the area of the item you want to crop until you have a boxed area that looks close to what you want the PDF to look like. Once everything is good to go, press OK.
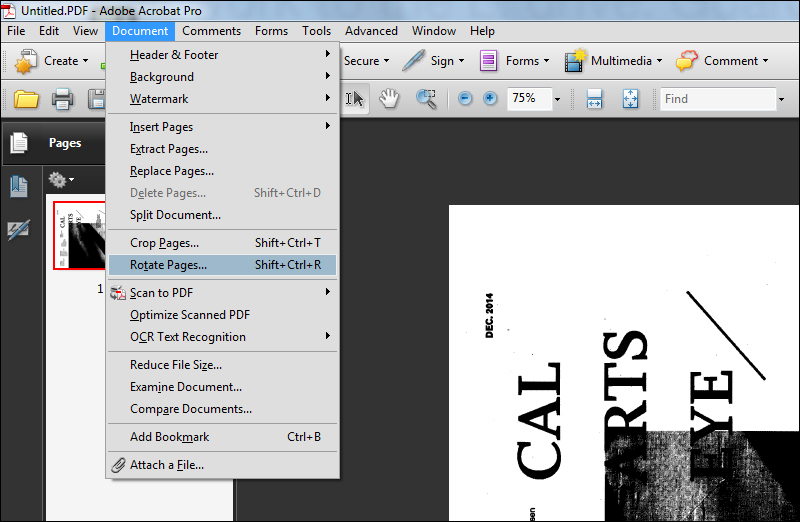
Rotating Pages
If your scanned item is still flipped in an unwanted direction after enabling OCR, you can also fix this using Acrobat as well. At the top menu bar, go to Documents -> Rotate Pages.
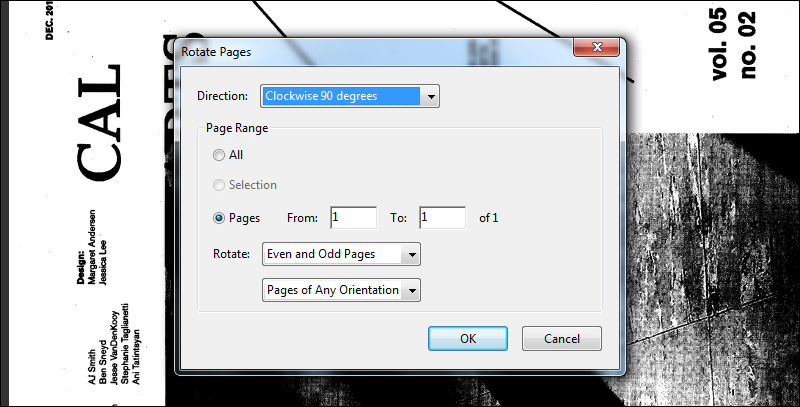
This will open a new window where you can rotate the scanned item in the direction you need. From the dropdown menu, select the direction and the amount that you wish to rotate the scanned item, and press OK.
PDF Quality
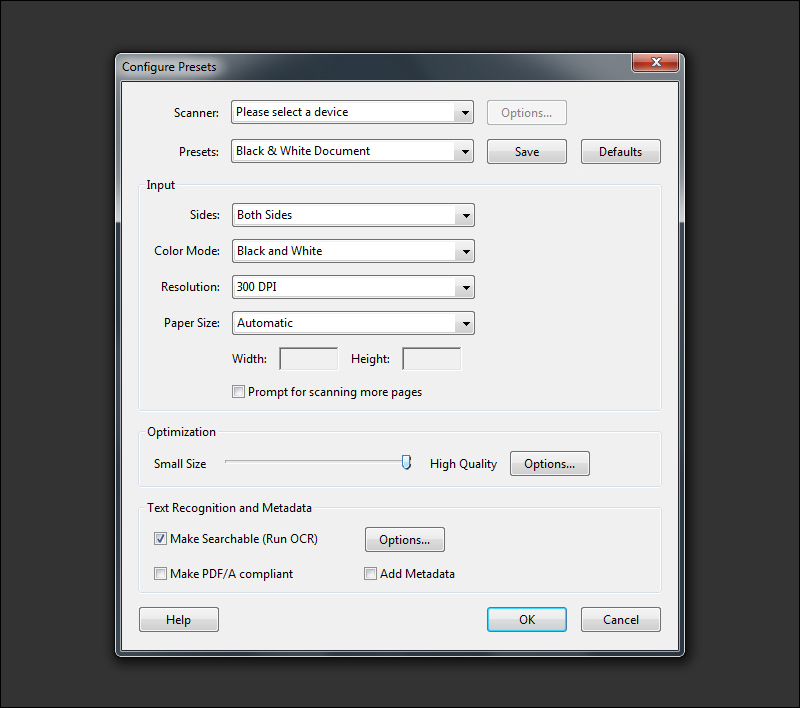
If you notice that your scanned item is blurry, it may be that the quality is set too low. To fix this go to the top menu bar, and select Document -> Scan to PDF -> Configure Presets.

This will open a new window. Near the bottom is a section called Optimization. Move the slider towards the right side (towards the text High Quality), and then press OK. You can also increase the resolution as well.
One thing to note is that your file size will increase and scanned speed will slow with the higher you set your quality. Once your settings are ready, you will need rescan your item for these settings to take affect.
Finishing Up
The final step would be to make sure to save your PDF so you don't lose any of the work you just did. Once the file is saved, you should be good to go. If you run into any issues trying to scan items, please feel free to stop by the IT Office next to the Library Lab, and let us know if we can help out!
Comments
Please sign in to leave a comment.